Wednesday, January 26, 2011

Ottolenghi's Cauliflower and Cumin Fritters with Lime Yogurt


I have become mildly obsessed with Yotam Ottolenghi. Okay, let me just be honest, I have a big-time crush. Yotam has a cooking column in The Guardian and his dishes always look incredible. You can imagine, then, how happy I was when Yana,(She Cooks With Books), invited us over for dinner...and her Bible for the evening? The eponymous Ottolenghi. Big happy smiles.
Yotam Ottolenghi, an Israeli ex-pat, moved to London from his hometown of West Jerusalem. His partner, Sami Tamimi, is Palestinian from East Jerusalem. And their bond? Food. Folks, this is my kind of partnership. Their dishes have a range of Mediterranean and Middle Eastern influences -- they use sumac, za'atar, pistachio, rosewater, cumin and lots of regional herbs.
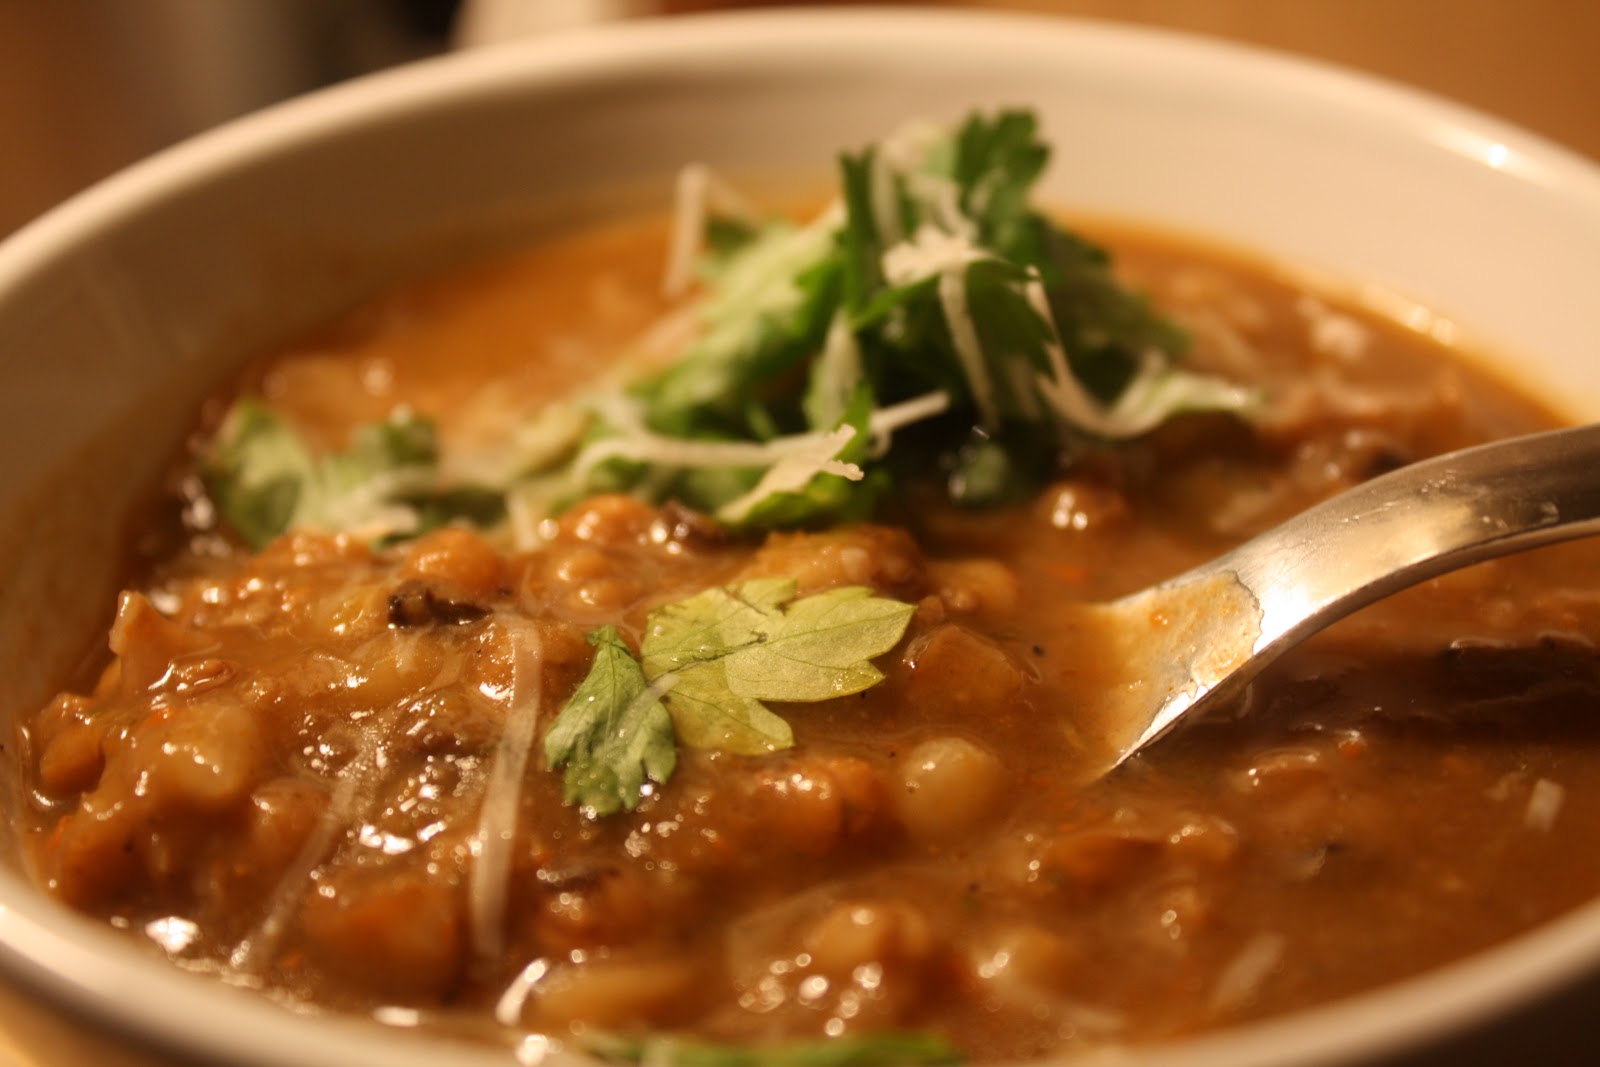
For our winter (birthday) feast Yana's made a lentil, red onion and chard soup, roasted butternut squash with pomegranate molasses, cauliflower and cumin fritters with lime yogurt, and for the omnivores of the bunch- roasted chicken with saffron, hazelnuts and honey. It was all excellent! We had three desserts: meringues with pistachio and rosewater, swedish chocolate balls with coconut (see this post) and I made a pumpkin-chocolate-chip loaf...which was moister than moist! It was a wonderful meal and I have decided to make the fritters for dinner tonight.
Cauliflower and Cumin Fritters with Lime Yogurt (Courtesy of Ottolenghi)
Serves 4
1 small cauliflower
120 grams (1 cup) plain flour
3 tablespoons chopped flat-leaf parsley, plus a few extra leaves to garnish
1 garlic clove, crushed
2 shallots, finely chopped
4 free-range eggs
1 1/2 teaspoons ground cumin
1 teaspoon ground cinnamon
1/2 teaspoon ground turmeric
1 1/2 teaspoon salt
1 teaspoon black pepper
500 ml sunflower oil for frying (I just lightly coated the pan)

Lime sauce
300 grams Greek yogurt
2 tablespoons finely chopped coriander
grated zest of one lime
2 tablespoons of lime juice
2 tablespoons of olive oil
salt and pepper


Directions
  1. Put all the sauce ingredients in a bowl and whisk well.  Taste- looking for a vibrant, tart, citrusy flavor-- and adjust the seasoning. Chill or leave out for up to one hour.
  2. To prepare the cauliflower, trim off any leaves and use a small knife to divide the cauliflower into little florets.  Add the to a large pan of boiling salted water and simmer for 15 minutes or until very soft. Drain into a colander.
  3. While the cauliflower is cooking, put the flour, chopped parsley, garlic, shallots, eggs, spices, salt and pepper in a bowl and whisk together well to make a batter. When the mixture is smooth and homogeneous, add the warm cauliflower.  mix to break down the cauliflower into the batter.
  4. Pour the sunflower oil into a wide pan to a depth of 1.5 cm and heat up. (I didn't use that much oil. I just put enough to thinly coat the pan.) When it is very hot, carefully spoon in generous portions of the cauliflower mixture, 3 tablespoons per fritter. Take care with the hot oil. Space the fritters apart and don't overcrowd the pan. Fry in small batches, controlling the oil temperature so that the fritters don't burn. They should take 3-4 minutes on each side.
  5. Remove from the pan and drain well on a few layers of kitchen paper.  
  6. Serve with the sauce on the side.
Follow Me on Pinterest

Tuesday, January 25, 2011

Brooklyn's Baked Brownies: A Bit of Chocolate Heaven

According to popular lore, these are Oprah's favorite brownies.  But I wanted to know, how do these really taste? The verdict? Fantastic.
I used 68% cacao chocolate and followed the instructions to-a-T.  Like everything else I have made from the Baked Bakery in Red Hook, Brooklyn (including Banana Espresso Chocolate Chip Muffins and Pumpkin-Chocolate Loaf) these hit the spot and made me forget that this winter has been...well, absolutely awful.  So don't fret the 16 degree weather and the non-stop snow that keeps you homebound. Just warm a brownie square in the oven and serve ala mode!
Be careful not to over-bake, under-bake or over-mix.  
Now say it with me, "If it's good enough for Oprah, it's good enough for me!"
Baked Brownies (Courtesy of Baked: Matt Lewis and Renato Poliafito)
Ingredients
1¼ cups all-purpose flour
1 teaspoon salt
2 tablespoons dark unsweetened cocoa powder
11 ounces dark chocolate (60 to 72 percent cacao), coarsely chopped
1 cup (two sticks) unsalted butter, cut into one-inch pieces
1 teaspoon instant espresso powder
1½ cups granulated sugar
½ cup firmly packed light brown sugar
5 large eggs, room temperature
2 teaspoons vanilla extract


Directions
  • Preheat the oven to 350 degrees. Butter the sides and bottom of a 9×13-inch glass or light-colored metal baking pan.
  • In a medium bowl, whisk together the flour, salt and cocoa powder. Put the chocolate, butter, and instant espresso powder in a large bowl and set it over a saucepan of simmering water, stirring occasionally, until the chocolate and butter are completely melted and smooth. Turn off the heat, but keep the bowl over the water and add the sugars. Whisk until completely combined, then remove the bowl from the pan. The mixture should be at room temperature.
  • Add three eggs to the chocolate mixture and whisk until combined. Add the remaining eggs and whisk until combined. Add the vanilla and stir until combined. Do not overbeat or your brownies will be cakey.
  • Sprinkle the flour mixture over the chocolate mixture. Using a spatula (not a whisk), fold the flour mixture into the chocolate until just a bit of the flour mixture is visible.
  • Pour the batter into the prepared pan and smooth the top. Bake in the center of the oven for 30 minutes, rotating the pan halfway through. The brownies are done when a toothpick inserted into the center comes out with a few moist crumbs sticking to it. 
  • Let the brownies cool completely, then cut them into squares and serve.
Follow Me on Pinterest

Friday, January 21, 2011

A "Sunny" Side Dish: Roasted Winter Squash Toss

I'm not exactly known as a 'gym rat' but I do like to work out a few times a week. I don't do anything too strenuous, just 40-50 minutes on the elliptical followed by some light weight exercises.   Now, when the weather is nice, I can easily be convinced to go long hikes or walks in the park. I find it stimulating, invigorating and I love being outdoors. I never get bored walking outside and am always going on new hikes thanks to 50 Hikes of the Lower Hudson Valley.  But boy can I get bored in the gym.  So how do I keep my legs working without going bonkers?  I watch the Food Network (of course!) and that makes the time fly by.  With the help of my culinary friends on the tube (Ina, Giada, Tyler or Sunny-- depending on what time I go), 45 minutes to an hour just whizzes by.
Anyway, that long story about my physical exercise routine probably could have been boiled down this: I saw Sunny Anderson make this dish that highlights winter produce the other day, while I was at the gym.  She used winter squashes, butternut and acorn, and made a rub using olive oil, cumin, garlic, chili flakes, sugar and cinnamon.  The addition of toasted almonds provides a nice and contrasting texture.  Then Sunny dressed the squash with orange zest and juice.   

This is a very simple way to prepare squash and it has a nice flavor.  It's the perfect side dish for a winter meal!  Oh, and with a prep time of under 10 minutes, you really can't go wrong...


Roasted Winter Squash Toss (Courtesy of Sunny Anderson)
Ingredients
2 cloves garlic, minced
1/4 cup olive oil
2 tablespoons dark brown sugar
2 teaspoons ground cumin
2 teaspoons red chili flakes
1 teaspoon cinnamon
Kosher salt and freshly ground black pepper
1 (2 pound) butternut squash, peeled, seeded and cut into 1/2-inch cubes
1 (1 1/2 pound) acorn squash, seeded and cut into 1/2-inch cubes
1/2 cup almond slivers
1/2 orange, zested and juiced (about 1/3 cup juice and 1 tablespoon zest). The zest cuts down on the sharpness of the chili flakes...just a bit.


Directions
Preheat oven to 425 degrees F. In a large bowl, mix together garlic, olive oil, sugar, cumin, chili flakes and cinnamon. Add squash cubes and toss well to evenly coat. Season with salt and freshly ground pepper. Place on two sheet pans and bake until nicely caramelized and soft when poked with a fork, stirring squash halfway through baking, about 25 to 30 minutes. While baking, place almonds in a dry skillet over medium-high heat and toast, stirring often, until lightly golden, about 4 minutes. Transfer squash and almonds to a serving bowl, toss with orange juice and zest, and serve.


Follow Me on Pinterest

Saturday, January 15, 2011

Baked Eggs with Salsa Verde

There are a few things that I miss from my old neighborhood:  the super close proximity to Prospect Park, the central library, the Botanic Gardens and the Brooklyn Museum.  I also miss a handful of ice cream shops and fantastic restaurants.  But what I really miss is my Wednesday night dinner from Chavellas.  Though I cook most of my meals at home, on Wednesday night I made an exception.  I religiously ordered-in the weekly special:  chilaquiles tortillas simmering in tomatillo salsa with two fried eggs, queso, crema and refried beans.  I became obsessed with tomatillo salsa (or salsa verde/green sauce) and was on the hunt to find one that was as good as the one served at Chavella's but in my new neighborhood.  Lucky for me, we are only a few stops away from Brooklyn's best Mexican food and I found my new "go-to" place.  Their salsa verde is amazing and I was thinking about buying a gallon of the stuff, you know, just to have around the house 'in case.'  But then I got thinking: "Why, if I am obsessed with salsa verde, have I never tried to make it at home?"  Well, now I can say that I tried and I was successful!
Salsa verde is a puree of cooked tomatillos, jalapeno peppers, onion, salt, cilantro and an optional dash of lime.  This recipe is extremely easy to make and comes from the Food Network Kitchens.  I got a pound of tomatillos from Rossman's on 3rd Avenue and they were delicious.  I cooked them in boiling water until they changed color, about 7 minutes.  Then I pureed them with jalapeno chile, garlic, onion, salt and cilantro.  The eggs go perfectly with the salsa.  You bake the whole dish for 15 minutes (be very mindful of the time or they will overcook and not be runny), then add cheese and cook for one more minute.  I made a side of breakfast potatoes to top off this fantastic brunch.  Buen provecho!
Baked Eggs with Salsa Verde (Courtesy of the Food Network Kitchens)
Serves 2
Ingredients
Vegetable oil, as needed
1/3 cup Salsa Verde, recipe follows (I used double)
4 large eggs
Kosher salt and freshly ground black pepper
1/4 cup shredded Monterey jack cheese (about 1/2 ounce)
2 tablespoons chopped fresh cilantro leaves
Directions
Preheat the oven to 400 degrees F.
Lightly oil a medium nonstick skillet with an ovenproof handle. Spoon a heaping 1/3 cup of salsa into the pan. Lightly press down the salsa to make 4 evenly spaced shallow nests and break an egg into each. Season with salt and pepper. Bake until the egg whites are cooked and the yolks are still runny, about 15 minutes. Sprinkle the cheese over the eggs and continue baking until just melted, about 1 minute more. Top with the cilantro. Serve immediately.


Salsa Verde:
1 pound tomatillos, husked and rinsed
1 clove garlic
1/4 medium onion
1/4 jalapeno chile, with seeds
1 teaspoon kosher salt
4 sprigs fresh cilantro


Put the tomatillos in a medium saucepan with water to cover. Bring to a boil and cook until tender, about 7 minutes. Drain.


Puree the garlic, onion, jalapeno, and salt in a blender until smooth. Add the tomatillos and cilantro sprigs and puree until smooth.
Yield: About 3 cups


Follow Me on Pinterest

Sunday, January 9, 2011

Gaufres de Liege (Belgian Sugar Waffles)


The day after a massive storm hit NYC, I found myself feeling a bit stir crazy and determined to take Otis outside for some fresh air. That was a mistake. It was extremely cold, ferociously windy and the scene from the street was straight out of 28 Days Later, or some other post-apocalyptic movie. Buses were stalled in the middle of main thoroughfares, almost every store was closed, cars were stranded in the streets and everyone was wandering around looking hungry and/or confused.
But there was a light in the distance. I almost couldn't believe my eyes. For some reason, this tiny little Belgian bakery on 9th Street in Park Slope,Colson Patisserie, was open for business. I ran in the snow, stepped inside the warm room and ordered a hot cocoa and waffles.
It was on that day, the one after the terrible blizzard of '10 (one of the worst in NYC history), that I ate the best waffle I had ever eaten. Ever.

This wasn't your standard waffle topped with tons of whipped cream and a cherry. This was a Belgian sugar waffle, or a Gaufres de Liege. Unlike the Gaufres de Brussels (which is what most people think of when they hear Belgian waffles), the Gaufres de Liege is oblong, more or less oval-shaped, and thinner and smaller than the Brussels waffle.

"It's also more substantial. It has a significant crunch due to the small nuggets ofparelsuiker or "pearl sugar" that are added to the batter just before baking. These bits of sugar melt when    being baked on the waffle iron and caramelize, producing a sugary crust like what's found on top of a creme brulée." 
-Europeancuisine.com

I did a google search for a recipe and this one came up. It's from Chichi of My Chalkboard Fridge, by way of Doc Doughtery, by way of The Kitchn, presented here by way of notmartha.org. It's a terrific recipe and really authentic. It hits the spot. And the next time I find myself stuck indoors due to a winter storm (or really any other time), I'm totally making these.
Enjoy. Eet smakelijk! Bon Appetit!


Gaufres de Liege
makes 12 waffles
Ingredients
6 tablespoons warm milk (no hotter than 110°F) 
1/2 teaspoons granulated sugar 
2 teaspoons instant yeast 
1 1/2 cups (230 grams) bread flour, sifted 
1 teaspoons cinnamon 
2 teaspoons vanilla extract 
1/2 teaspoons salt 
1 medium egg 
1 egg yolk 
1/2 cup unsalted butter, at slightly cooler than room temperature (I adapted this an used 1/4 cup of unsalted butter, or 4 ounces.)
140 grams turbinado sugar, or pearl sugar if you choose (I went with 3/4 cup. It's worth seeking out Lars Belgian Pearl Sugar if you can find it. For those of you who live near a Fairway, they have organic turbinado sugar for $3.99.) 
Cooking spray 
  1. Dissolve the sugar in the warm milk; then add the yeast. Make sure that the milk is not too hot, lest it kill the yeast instead of promoting its growth. Place a plate or some kind of cover on top of the bowl with the milk, sugar and yeast.  Set aside for about five minutes. When you check on it, the yeast should have bubbled up, looking light brown and spongy. 
  2. Meanwhile, mix the sifted bread flour with the cinnamon, vanilla extract, and salt in the bowl of a stand mixer.  Pour in the yeast mixture; then add the whole egg and egg yolk.  Mix on medium speed until it is fully combined.  The dough will be yellow and stiff, yielding only slightly to a poke.  Cover the mixing bowl with plastic wrap and let the dough rest in a warm place for about thirty minutes. 
  3. Beat in the butter piece by piece; you do not have to wait for the prior piece to be fully incorporated before adding the next.  When the dough has incorporated about half of the butter, the mixture will be like a very thick, somewhat broken-up paste.  If you keep engaging the mixer on medium-high speed, the dough will eventually become a cohesive whole, looking smoother and more feeling more elastic.  Scrape the sides of the bowl if needed.
  4. Kneading very gently, incorporate the sugar crystals just enough to get them evenly distributed.  Work quickly so as not to soften the buttery dough too much. 
  5. Divide the dough into a dozen equal pieces, gently forming them into balls.
  6. Place the balls of dough on a cutting board in a warmish place for fifteen minutes or so.  During the last two minutes of this resting time, preheat your waffle iron until it is very warm, but not hot.
  7. Spray the griddles with cooking oil.  Place each ball of dough in a whole square or section of the waffle iron.  Like regular waffle batter, the dough will start to puff up.  Cook the waffles until the surface is golden to dark brown.  Be sure that the waffle iron you are using is appropriately deep, or else the interior of the waffle will not be cooked through.  If you are using a vintage stovetop waffle iron, flip the iron every thirty to forty seconds, lifting the iron to check the rate of browning.  The browning should be gradual to allow the interior to fully develop.
  8. Set the waffles on a cooling rack as they come out of the iron to promote a crispy exterior. Serve immediately with a sprinkling of powdered sugar.
Any leftover waffles, if they are not dark brown, can be carefully re-cooked in a toaster for approximately thirty to sixty seconds. (Again, beware hot molten sugar.) Leftover waffles may also be kept in an airtight container between sheets of parchment paper, for up to three days.
Follow Me on Pinterest

Thursday, January 6, 2011

Spinach and Sheep's-Milk Ricotta Gnocchi with Asiago

When we moved back to New York, after living in New Orleans for 6 years, we lived in a small apartment on Carroll Street in Park Slope.  I liked the close proximity to Prospect Park and was excited about the neighborhood restaurants.  In addition to Al di La and Rose WaterConvivium Osteria was high on my "go-to" list.  I eventually went and it did not disappoint.  
Convivium is part Italian, part Spanish and part Portuguese and it's all parts delicious.  As a vegetarian I was happy to see an entrée on the menu that wasn't pasta.  These spinach and sheep's-milk ricotta gnocchi with Asiago cheese are rich little dumplings that hit the spot.  You only need about 7 or 8 per portion.  Also, since there aren't a lot of ingredients in this dish, it really is important to buy the highest quality of cheese and produce you can find.  As they say in Lisboa, Bom apetite!
Spinach and Sheep's Milk Ricotta Gnocchi with Asiago (Convivium Osteria, by way of The New Brooklyn Cookbook)
Makes 32 Gnocchi
For the gnocchi:
1 1/2 pounds of organic spinach, stems removed, coarsley chopped (I used small leaf)
1 cup (1/2 pound) sheep's-milk ricotta or well-drained whole-milk ricotta*
2 large eggs, lightly beaten 
1/4 cup unseasoned fresh bread crumbs
3/4 cup all-purpose flour, divided (1/4 for the gnocchi and 1/2 for dredging) 
1/3 cup grated Parmigiano-Reggiano
1 teaspoon coarse salt
For the sauce:
3 tablespoons grated Asiago cheese, plus (quite a bit) more for garnish
1 1/2 cups of whole milk
1 1/2 cups heavy cream
* If using whole-milk ricotta, wrap the ricotta in a cheesecloth, gather into a ball, tie and drain over a bowl in the refrigerator overnight.


Directions:
1. To prepare the gnocchi: bring a large pot of salted water to a boil.  Add the spinach and cook for 5 to 6 minutes, or until tender but not mushy.  Drain in a colander and use the back of a wooden spoon to force out any excess water.  Wrap the spinach in a clean dish towel and wring out any remaining water.  Spread the spinach on a dry surface.  When it is no longer steaming, transfer it to a large bowl.  Add the ricotta and mix with a fork until well combined.  Add the eggs, bread crumbs, 1/4 cup flour, Parmigiano-Reggiano, and salt.  Mix until smooth.
2. Place 1/2 cup flour in a shallow dish, line a rimmed baking sheet with parchment (I used wax paper) and lightly flour the parchment.  Using two tablespoons, shape the mixture into ovals.  Dredge the gnocchi in flour to coat, then tap off any excess.  Place the gnocchi on the baking sheet and refrigerate for 1 hour.
3.  When you are ready to cook the gnocchi, bring a large pot of salted water to a boil.  While the water is coming to a boil, prepare the sauce.  Combine the Asiago, milk and heavy cream in a medium saucepan over medium heat.  Whisk until the sauce thickens and coats the back of a spoon, about 10 minutes.
4.  Add the gnocchi to the boiling water and cook for about 3 minutes.  Using a slotted spoon, transfer the gnocchi to the saucepan with the sauce.  Gently toss to coat, cooking for 30 seconds.  Divide the gnocchi and sauce among the bowls and garnish with additional Asiago. 
Follow Me on Pinterest

Sunday, January 2, 2011

Winter Warmth: Mushroom Barley Soup


Mushroom Barley Soup with Parsley and Grated Pecorino Romano
Goodbye 2010. Hello 2011. Hope you are all having a happy new year. I am excited about some of my new resolutions-- nothing too ambitious and all very manageable. Other than the regular self-improvement stuff (no need to post), this year I want to:

* work on my technical photography skills (take a class) and learn photoshop
* expand my culinary horizons- work on Vietnamese, Indian, Mexican, Thai and Sichuan
* lead at least two historic walking tours
* read one book every three weeks
* learn how to grill in our new outdoor space

Now for those of you wondering why there haven't been any new posts recently, well, we moved...the day of the massive blizzard. It was a mess. There was little time for homemade apps, soups or sauces. And I wasn't sure where our camera was anyway. I am happy to report that we have been reunited with all of our things that were stranded for more than a week in Prospect Heights. Hooray.

Though many of our belongings have been unpacked, we still haven't dug out our car and I haven't made my weekly Fairway run. You can imagine, then, how excited I was when Yana invited us over for dinner (we are neighbors). We had some fantastic eats, including spicy samosas and lentil donuts. But the best part of the meal was her mushroom barley soup topped with fresh parsley and grated pecorino. It's the perfect winter-weather-stuck-indoors sort of meal. With Yana's permission I am posting her recipe today. This is a real treat because Yana is my first 'guest blogger.'
So without further delay, here is Yana in her own words... 

Mushroom-Barley Soup Topped with Parsley and Grated Pecorino Romano
Ingredients
2-3 ounces of dried porcini mushrooms
A few tablespoons of olive oil
3 medium onions
3 ribs of celery
4 medium carrots
6 cloves of garlic
Kosher salt and black pepper, to taste
Handful of fresh parsley
2-3 tablespoons of tomato puree
8 cups of water or vegetable stock, or a combination
1 1/2 cups of barley
Fresh parsley and grated pecorino for garnish


We'll be moving soon, so I want to cook all the little bits and pieces that are in my fridge and cupboard so I don't need to move them! I was digging around in the bottom shelf of my pantry today and found a bag of dried porcini mushrooms from one of E's favorite places, the Atlantic Spice Company. I also had some barley and soup veggies in the fridge, so I was set.

The last time I cooked barley, I made a red wine and mushroom risotto and it was a bit of a disgrace! Basically, I wasted a lot of food and no one wanted to eat it. So I decided to do a bit of research and check out a few different recipes to find something truly lovely. I wasn't disappointed!

First, I used about 2-3 ounces of dried porchini mushrooms. This looked like about 1 cup of fried mushrooms, loosely packed. I soaked them in 2 cups of boiling water. We will use this water later, so don't pour it away!
In a large stock pot, I heated a bit of olive oil and lightly sauteed 3 medium onions, 3 ribs of celery, 4 medium carrots, 6 cloves of garlic with a hefty pinch of kosher salt and black pepper. I cooked it over a medium heat with the lid on till the veggies were slightly caramelized. I added a handful of parsley, chopped and stirred, then moved the veggies to the sides of the pot and dumped about 2-3 T of tomato puree in, and let it cook a bit. Brought the heat up to medium high, and mixed all together and let it cook a few minutes.

After the mushrooms have soaked for about 30 minutes, pour off the liquid through a sieve. Maybe use a cheesecloth or paper towel, as gritty bits tend to come off. Chop the mushrooms finely.

As the veggie and tomato paste mixture has been cooking a few minutes and getting super delicious, add the mushroom liquid. Bring it to a boil and mix well. Use an immersion blender to puree all the bits and make it thick and delicious, then add the chopped mushrooms. Add about 8 cups of water or stock. I used water and a bit of stock concentrate, better than beef bullion, veggie style. Add 1.5 cups of barley, bring to boil and cook at a low boil for 60-90 minutes, depending on how you like your barley. Add salt to taste.

Serve with a sprinkle of chopped parsley and I grated a bit of pecorino romano cheese on top.

Follow Me on Pinterest